Friday, December 18, 2009

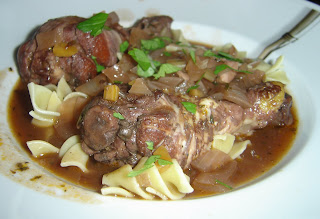
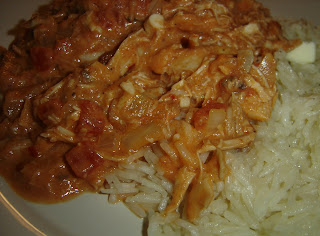
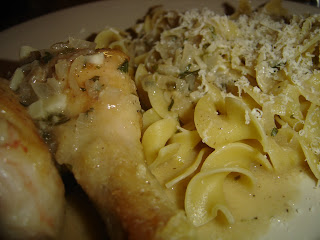
Chicken in White Wine Sauce

About three weeks ago, I decided I wanted to make some sort of chicken in a wine sauce. When I decided that, I was thinking I was going to make something like the Coq au Vin I made months ago and loved. Apparently I wasn't really feeling it because it stayed on my menu planning list for almost three weeks. Then, tonight, I got inspired and ended up creating something completely different, but very delicious. We both loved this - it managed to be both light and hearty at the same time and bursting with flavor.


Chicken in White Wine Sauce
Serves 2
Prep Time - 10 minutes
Cook Time - 20 minutes

INGREDIENTS
4 oz egg noodles
4 chicken legs
flour, seasoned with salt & pepper, for dredging
1 TBSP butter
1 TBSP olive oil
1 shallot, finely diced
4 cloves garlic, minced
3/4-ish cup white wine
3/4-ish cup chicken stock
1/2-ish cup whole milk (or other dairy liquid)
1/2 tsp dried parsley
1/4 tsp dried chives

DIRECTIONS
Preheat oven to 350 degrees F.

Heat oil & butter in a large skillet over medium-high heat. Dredge chicken legs in seasoned flour. Add to pan and brown on all sides. Transfer to cookie sheet and continue cooking in the oven until the sauce is done.

Meanwhile, cook egg noodles to al dente (to have them done around the same time as the sauce, drop them after you put the chicken in the oven).

If your pan is dry, add more olive oil. Add shallots & garlic and cook until the shallots begin to soften.

Add wine to de-glaze the pan and let cook until the alcohol has burned off and liquid has reduced by at least half. Add stock, parsley, & chives, and cook for about 5 minutes.

Add milk (I used some leftover whole milk, but I think any dairy you have on hand would do the same thing) and cook for about 5 minutes, or until the sauce thickens. Season with salt & pepper to taste. If the sauce doesn't get as thick as you'd like, feel free to thicken it with a cornstarch & water slurry.

Spoon the sauce over the egg noodles and chicken. Top with grated Parmesan cheese if desired.

Friday, December 11, 2009

Feta-Stuffed Chicken

I like feta cheese, but I don't have many recipes that use it, and most that do only use a small amount. So, I'm always looking for ways to use up whatever I have left. Sadly, I often end up letting some feta to go to waste. Then, one day, I got the idea that I could use it to stuff chicken. So, after looking around my kitchen, I came up with these feta-stuffed chicken breasts.


Feta-Stuffed Chicken Breasts
Serves 2
Prep Time - 10 minutes
Cook Time - 15 minutes

INGREDIENTS
2 chicken breasts, pounded thin
3-4 oz cream cheese, softened
feta cheese, to taste (I think I probably used about 1/4 - 1/3 cup)
1/2 tsp oregano
2 cloves garlic, minced
salt & pepper
flour, for dredging
1-2 TBSP olive oil

DIRECTIONS
Mix together cream cheese with feta, oregano, and garlic. Put about 1/2 of the mixture on each chicken breast and roll up. Secure with toothpicks, if necessary.

Season some flour with salt & pepper. Dredge the chicken in the seasoned flour. Shake off any excess.

Meanwhile, heat oil in a pan over medium to medium-high heat. Add the chicken breasts to the pan and brown on all sides. If necessary to ensure the chicken is fully cooked, transfer to the oven and cook for about 10 minutes at 350 degrees F.

Sunday, December 6, 2009

Marshmallow Crunch Brownies

How do you make a brownie better? You add peanut butter, of course. And, if you want to make it even better, you add rice krispies and marshmallows. What you get is brownie heaven. I remember my grandma making something similar once or twice when I was younger, and really loved them, so when I found them on a blog I read frequently, I was super excited. You must make these now.


Marshmallow Crunch Brownies
Recipe by Peabody, modified

INGREDIENTS

Brownies
1 cup butter, melted (no substitutes)
2 cups sugar
4 eggs
1 1/2 cups flour
1/2 cup cocoa
1 tsp vanilla

Topping
7 oz mini marshmallows
1 1/2 cups milk chocolate chips
1 cup creamy peanut butter
1 TBSP butter
1 1/2 - 2 cups rice krispies

DIRECTIONS
Preheat oven to 350 degrees F.

Mix together all brownie ingredients. Pour into 9 x 13 pan and bake for 25-30 minutes, or until just done.

Remove brownies from the oven and sprinkle with the mini marshmallows. Immediately return to the oven and bake for another 3 minutes. Remove immediately.

While the brownies are in the oven, mix together the topping by doing the following:

Place the chocolate chips, butter, and peanut butter in a medium saucepan over low heat. Stir constantly, until melted. Remove from heat, add the rice krispies, and stir. Let cool for about 3 minutes and then spread over the brownies. Allow to cool completely and then chill. Serve cold.

Thursday, November 12, 2009

English Muffins

English muffins are one of my favorite breakfast foods. Since I successfully started making bagels, I've been interested in making English muffins. I was curious if the effort and of making them and the taste would be worth it. So, when I had some spare time on a Saturday, I tried making them. Because I love my breadmaker, I used that to knead the dough and let it rise.

They were a bit tedious to make, but in the long run, they're so much better than the ones you buy at the store. I would definitely recommend trying to make them over buying them.


English Muffins
Recipe from King Arthur Flour website (modified slightly)
Makes 16-20 muffins

INGREDIENTS
1 3/4 cups warm milk
3 TBSP butter
1 1/4 tsp salt
2 TBSP sugar
1 large egg, lightly beaten
4 1/4 cups unbleached flour
2 tsp yeast

DIRECTIONS
Place the ingredients in the pan of your bread machine following the manufacturer's instructions. Use the "dough" setting. After the cycle is complete, transfer the dough to a cornmeal-sprinkled surface and roll it out until it's about 1/2-inch thick. Cut out the muffins in about 3-inch rounds. Re-roll and cut out any leftover dough. Cover the muffins with a damp cloth and let rest for about 30 minutes.

Heat a cast iron skillet to very low heat (a hard-annonized skillet didn't work as well). Do not grease, but sprinkle with cornmeal. Cook 4-5 muffins at a time, cornmeal side down first, for about 5-7 minutes per side.

Check after about 4 minutes to see that the muffins are browning gently and are neither too dark nor too light. If they are cooking either too fast or too slowly, adjust the temperature of your pan or griddle.

When brown on both sides, transfer to a wire rack to cool.

Sunday, November 8, 2009

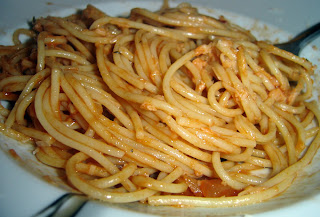
Spicy Spaghetti all'Amatriciana

Amatriciana (pronounced: mah-tree-shawna) is a very traditional Roman dish. Word is that you can find it any any osteria in the region. Despite that, I've never had it in either trip to Rome. I don't know why. I think I'm probably just too obsessed with the plain spaghetti, lasagna, and pizza to branch out too much. Call me a creature of habit.

Now, as you should all know, I love simple recipes that don't take a whole lot of time to prepare. So, when I came across this recipe on foodnetwork one day, I knew I had to try it. I took a few liberties with the recipe, and we both really liked it. I can't wait to try making it again with a few simple changes.


Spaghetti all'Amatriciana
Serves 4
Prep Time - 5-10 minutes
Cook Time - 20 minutes

INGREDIENTS
1/4 lb pancetta, cut into thin strips*
2 TBSP olive oil
1 medium onion, diced
2-3 cloves garlic, minced
1/2 tsp red pepper flakes (be generous)
2 tsp flat leaf parsley, chopped
1 1/2 TBSP red wine vinegar
1 cup tomato puree
1/4 cup chicken stock
3/4 lb spaghetti
freshly grated Parmesan cheese

DIRECTIONS
Cook pasta to al dente. Drain & set aside.

Heat a large saucepan over medium heat. Add oil, and cook the pancetta until the fat begins to render out. Do not let it get crispy. Add onions & garlic and cook until the onions become translucent, about 3-5 minutes. Add red pepper flakes and parsley and stir.

Add the vinegar and let cook until it evaporates, about 2 minutes.

Add tomato puree and stock. Reduce heat to a simmer.

Add pasta to the saucepan and toss to coat. Let simmer for 3-5 minutes, or until the pasta absorbs a bit of the sauce. Serve with lots of freshly grated Parmesan cheese.

*Given the relatively high cost of pancetta around here, I'm going to try to make this recipe without it next time. I think it added something to the sauce, but I'm not sure it adds enough to outweigh the expense.

Tuesday, October 20, 2009

Chicken Ragu with Whole Wheat Penne

Whole wheat pasta was on a really good sale at the grocery store a couple of weeks ago. I'd never tried whole wheat pasta before, but had always been a little curious. When figuring out what to do with it, I came across a Rachael Ray recipe that seemed like it had some good concepts. Since I'm always on the lookout for quick, delicious meals, I decided to run with this one.

In the end, we both loved it. I couldn't taste a whole lot of difference between the wheat pasta and regular white pasta, except that the texture was a little bit different. I'd absolutely make this again, and try playing around with the recipe even more next time.


Chicken Ragu with Whole Wheat Penne
Loosely based on this Rachael Ray recipe
Serves 4-6
Cook & Prep time - 30 minutes

INGREDIENTS
1 lb whole wheat penne pasta
1 TBSP butter
1 TBSP olive oil
1 lb chicken breasts, cut into bite-size pieces
1 onion, diced
4 cloves garlic, minced
2 sprigs rosemary, finely chopped
1/2 cup chicken stock
1 can (28 oz) crushed tomatoes
salt & pepper
1/2 - 1 tsp red pepper flakes
1 bay leaf

DIRECTIONS
Cook pasta to al dente. Drain & set aside.

In a large skillet or dutch oven, melt the butter over medium heat. Add olive oil. Season the chicken with salt & pepper and brown.

Add onions, garlic and rosemary. Cook for about 5 minutes, or until onions get soft.

Add the chicken stock to deglaze the pan and let reduce for about a minute. Add the tomatoes and stir to combine. Season with salt & pepper and red pepper flakes.

Toss with the pasta and top with grated Parmesan cheese.

Thursday, October 15, 2009

Italian Beef

A while back, my husband and I were watching Man v. Food. In the episode we were watching, Adam went to an Italian Beef place in Chicago. Shortly after the episode was over, my husband suggested we try making them at home some day. So, we did. They were delicious. I can't say if they're authentic (though I would guess they're not), but they tasted great.


Italian Beef
Recipe from CDKitchen.com
Serves 2
Prep Time - 5 minutes
Cook Time - 20 minutes

INGREDIENTS
1 1/2 cups beef broth
1 cup water
3 TBSP tomato paste
1 bay leaf
1/2 tsp red pepper flakes
1 clove garlic, minced
1/2 lb thinly sliced roast beef
1 green pepper, thinly sliced
1 small onion, sliced
2 Italian rolls, sliced in half

DIRECTIONS
Mix together the beef broth, water, tomato paste, bay leaf, pepper flakes, and garlic in a medium saucepan over medium heat. Let cook for about 5 minutes.

Add the peppers, onions, and beef. Cook for about 10-15 minutes.

Build the sandwiches by adding the meat, peppers, and onions to the bun. Dip the buns into the jus and serve.

Saturday, October 10, 2009

Cabbage & Meatball Soup

When I was growing up, one of my favorite meals was my grandma's cabbage & meatball soup. I could've eaten bowls upon bowls of the stuff in a single sitting. Then, I moved away from home and away from Grandma's cooking. Sadly, I was away from my beloved cabbage & meatball soup for almost 10 years.

Recently, I found myself really craving it and decided to take a crack at figuring out the ingredients and making it on my own. I think Grandma would be proud.


Cabbage & Meatball Soup
Serves 6-8
Prep Time - 20 minutes
Cook Time - about 30 minutes

INGREDIENTS
1 TBSP butter
1 medium onion, chopped
1 clove garlic, minced
1 stalk celery, thinly sliced
1-2 carrots, sliced
1 medium head cabbage (somewhere between 1/2 & 1 lb), sliced
salt & pepper
4 cups chicken broth
1 cup water
2 cups beef broth
1/2 lb (more if you like) ground beef
2 tsp parsley, chopped
2 cloves garlic, minced
1 egg
1/4-1/2 cup bread crumbs
1/4 cup grated Parmesan cheese

DIRECTIONS
Melt butter in a large stockpot. Add onion, celery, carrot, and garlic and cook about 5 minutes, or until the onions begin to soften. Season with salt & pepper. While the veggies are cooking, chop up the cabbage.

Add cabbage and stir. Let the cabbage cook for about 3 minutes. Add broth & water. Put a lid on the pot and let simmer.

While the pot is simmering, mix together the ground beef, salt & pepper, garlic, parsley, egg, bread crumbs, and Parmesan cheese. Form into small balls (about 1" - 1 1/2") and add to the pot. Keep the cover on and let cook for about 10-15 minutes. If the pot comes to a heavy boil, turn down the heat. Season with salt & pepper to taste.

Wednesday, September 23, 2009

Grilled Wings

One of my favorite restaurants in the twin cities, Khan's Mongolian Barbeque, has these really great chicken wings. I've wanted to try to replicate them for years but could never find a copycat recipe for the marinade. Finally, at the suggestion of my husband, I decided to just look through my fridge and pantry and try to come up with a similar combination. We grilled them, and they were fantastic, but I'm sure they would be great baked or fried, too.


Grilled Chicken Wings
Serves 2-3
Prep Time - 5 minutes
Inactive time - at least 2 hrs
Cook Time - 10-12 minutes

INGREDIENTS
10-12 chicken wings
4 TBSP soy sauce
3 TBSP teriyaki sauce
1 tsp lemon juice
3 cloves garlic, minced
2-3 TBSP brown sugar
1 tsp cayenne pepper
1 tsp paprika
1/2 tsp garlic powder
1/4-1/2 tsp pepper

DIRECTIONS
Combine all ingredients, soy sauce through pepper in a zip-lock bag. Add chicken wings and make sure the marinade coats them all. Let sit in the refrigerator for at least 2 hrs.

Preheat the grill and cook the wings about for about 5 minutes on each side, or until cooked through.

Serve as either an appetizer or a main course.

Sunday, September 20, 2009

Amaretto Cheesecake

I love cheesecake. I also really love almond flavored desserts. So, put the two together and you'll get something really great, right? If you answered yes, you'd be correct.

After searching through a few online recipes and it seemed most simply replaced vanilla with almond extract and/or amaretto, so I decided to give it a shot. This was easily one of my favorite cheesecakes I've ever made. It's rich and creamy and has a nice subtle almond flavor. It's the perfect ending to a really great meal.


Almond Cheesecake
Serves 8-16
Prep Time - 20 minutes
Bake Time - 1 hr
Cool Time - 2 hrs

INGREDIENTS
1 1/4 cups crushed graham crackers
1/4 cup sugar
1/3 cup melted butter
3 (8 oz) blocks cream cheese, softened
1 (14 oz) can sweetened condensed milk
3 eggs, at room temperature.
1 tsp almond extract
1/2 tsp amaretto (optional - if left out, add an additional 1/2 tsp almond extract)

DIRECTIONS
Preheat oven to 325 degrees.

Before starting, wrap your springform pan tightly with foil.

Mix together the graham cracker crumbs, sugar, and melted butter. Press into the bottom of the springform pan.

In another bowl, beat together cream cheese with sweetened condensed milk. Add eggs, almond extract, and amaretto and beat until just combined.

Pour into the springform pan. Put the springform pan in a larger pan (I use my turkey roaster because it has a roasting rack inside). Put the pan in the oven and prepare the water bath, with the pan in the oven and the oven rack pulled out, by pouring 4-6 cups water, or about 1/4-1/2 inch water, into the roaster.

Bake for 1 hr, or until the cheesecake is almost set, but still jiggly in the middle. Turn off the oven and let the cheesecake sit in the oven for another 15-30 minutes until it is fully set. Remove from the oven and let cool on a wire rack for 1-2 hrs. Refrigerate for at least an hour, up to overnight.

Saturday, September 5, 2009

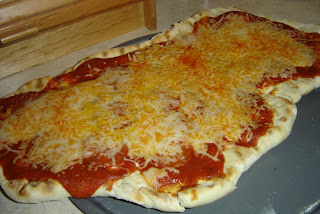
Grilled Pizza

Have you ever grilled a pizza? And I don't mean getting one of those grilled pizza pans from Papa Murphy's; I mean actually putting the crust on your grill and actually cooking the pizza on the grill. If not, you should. I know, I know, the thought of putting raw pizza dough directly on the grill is scary, but you can do it. I'll be there with you.

Grilled Pizza

Grilling a pizza is a quick process, so before you begin, make sure you have all your ingredients ready to go and outside at the grillside. So, if you're using veggies, get those chopped up and on a platter or bowl. If you're using toppings, get those ready too. If you're making sauce, get that ready, too. Having this all ready and at the grill before you get started cooking it will help you tremendously.

Heat your grill to 350 degrees.

Roll out your favorite pizza crust on a lightly floured surface. Don't worry about it being particularly pretty or organized. What matters is that it's about 1/4-1/2" thick. Put that crust on the back of a cookie sheet (or a pizza peel, if you have one) and take it out to the grill. You can use any crust you want, but I used this one from Mario Batali and it worked great.

Make sure the grate on your grill is well-oiled. Put the pizza directly on top of the grill. Trust me - it won't fall through. Cook for about a minute or two and then flip it over. Immediately after you flip, add your toppings. You should do this quickly to make sure your pizza doesn't burn.

After your toppings are added, cook for another minute or two. Remove from the grill. Let sit for a couple minutes before cutting. Your pizza will have a nice grill flavor, and will also have a great crunch like woodfire pizzas.

Coq au Vin

Who would've thought that when I was looking for meals that would use up all the ingredients in my refrigerator/freezer before moving to a new house, coq au vin would be what I made? I know, I was shocked, too. I had every single ingredient just waiting to be used.

For some reason, coq au vin always intimidated me a little. I really don't know why. I think it's the name. I was really surprised to find that while it took a bit of prep time, making it was super simple. It made my kitchen smell great and it was delicious.

Coq au Vin
Recipe adapted from Tyler Florence & Julia Child
Serves 3-4
Prep Time - 20 min
Cook Time - 1 1/2 hrs

INGREDIENTS
5-6 slices bacon
1 medium onion, chopped
2 carrots, diced
2 ribs celery, diced
5 cloves garlic, smashed
1 whole chicken, butchered
salt & pepper
1/4 cup brandy or cognac (optional)
3 cups dry red wine (I used Chianti)
2 cups chicken broth
2 tsp Herbes de Provence
1/4 tsp thyme
2 bay leaves
1-2 TBSP tomato paste (optional)
fresh parsley, for garnish

DIRECTIONS
Cut the bacon into 1" chunks. Heat a large pot or dutch oven over medium heat. Add about a tsp of butter or oil to the bottom of the pot and add bacon. Let the fat render out until the bacon is crisp. Remove from the pot with a slotted spoon and let drain on paper towels.

Meanwhile, season the chicken on all sides with salt & pepper. If you like, skin the chicken before seasoning. Add the chicken to the pot and brown on all sides (about 3 min per side). Add the onions, carrot, celery, and garlic to the pan. Saute for about 2 minutes.

Remove the pot from the heat and add brandy. With a long match or one of those grill lighters, ignite the brandy. The flames should die down within a minute. When the flames are out, return the pan to the heat.

Add the wine and chicken stock to the pot and stir. Add the herbs and stir till well combined. Cover and let simmer for an hour. Remove the lid and let simmer for about 15 minutes. If you would like the sauce a bit thicker, whisk in 1-2 TBSP of tomato paste. Season with salt & pepper to taste. Swirl in 1-2 TBSP of butter to also help with thickening and give the sauce a nice shine.

Garnish with fresh parsley and the reserved bacon. Serve alongside your favorite starch.

**Traditional coq au vin includes mushrooms. We do not like mushrooms, so I completely omitted them. If you're into mushrooms, add two cups of sliced mushrooms at the same time you add the veggies.

Sunday, August 9, 2009

Chicken Parmesan Burgers

I'd seen this recipe pop up on several blogs I read, and I was intrigued. I love chicken parmesan, but wasn't sure how it would trnslate into a burger. However, I've been trying to stock my arsenal with quick, easy dishes lately, so I I decided to give it a try.

We both really liked these. They definitely tasted like chicken parmesan, and the toasted buns were a nice touch. I'm sure ground turkey or ground beef would be delicious, too.


Chicken Parmesan Burgers
From Elly Says Opa!, adapted
Serves 2
Cook & Prep Time - 30 minutes

INGREDIENTS
3/4 lb ground chicken (1/2 of my 1.25 lb package)
1/8 cup grated Parmesan cheese
1/8 cup bread crumbs
1 tsp Italian seasoning
1 clove garlic, minced
1 shallot, diced fine
1/8 cup parsley, chopped
salt & pepper
marinara sauce
Shredded Italian cheese
2 toasted buns

DIRECTIONS
Combine meat with Parmesan, bread crumbs, Italian seasoning, garlic, shallot, parsley, and salt & pepper. Form into two patties.

Meanwhile, heat a about 1 TBSP of butter with some olive oil in a skillet. Also heat up marinara sauce in a small saucepan.

Cook the burgers about 4-5 minutes per side, or until cooked through.

Top with marinara sauce and Italian cheese and bake at 450 for about 2-3 minutes, or until the cheese gets bubbly. Serve on toasted buns.

Tuesday, August 4, 2009

Garlic Scape Pesto

I first tried pesto when I was 17 and in Minneapolis for the spring All-State Band festival. My high school band director took myself and my fellow band geeks to Edwardo's Natural Pizza (unfortunately, now closed) for what was pretty much the best pizza I've ever had, even to this day. It was a deep dish with pesto sauce, roasted garlic, and mozzarella, provolone, and Parmesan cheese.

I liked it so much that I made my parents go to this pizzeria with me the next time my family went to Minneapolis to visit family. My mom agreed with me; my dad kept complaining that there wasn't any meat on the pizza (silly dad).

I still crave that pizza occasionally.

A few weeks ago I went to the Farmer's Market and picked up a bunch of garlic scapes and decided to make pesto out of those. I was a bit nervous, but it was delicious! I wish I had made more batches to freeze.


Garlic Scape Pesto
Serves 2-3ish
Prep Time - 15 min

INGREDIENTS
10-12 garlic scapes, roughly chopped
1/2 cup Parmesan cheese
1/3 cup toasted pine nuts
1/4 - 1/2 cup extra virgin olive oil
salt, to taste

DIRECTIONS
Combine all in food processor until it reaches your desired consistency. Since I like pesto thinner, I used close to a full 1/2 cup of the olive oil, but depending on your preference, you may use more or less.

Toss with cooked pasta. I used fetuccini, but it's great on almost anything. Top with Parmesan cheese.

** Pesto also freezes really well. Store in an airtight container and it will freeze for several months.

Saturday, July 25, 2009

A Serious Note

While I don't normally do this, I'm going to write about something other than cooking for one post. I'm sorry to my readers who were hoping for a new recipe, but I think this is important enough to devote a post to it.

Two weekends ago, my husband and I went "up north" to visit my family and spend time at the lake. That Saturday evening was one of the scariest nights of my life. We were outside grilling burgers & pork chops for dinner, and we heard some very loud, repeated popping noises. Considering we were in the country, and basically in the middle of BFE, we both assumed either someone was playing with some leftover fireworks from the previous weekend or was shooting stuff, or something similar. However, it was really loud. And it smelled funny. And made a lot of cracking sounds. And pretty soon the sky was filled with really black smoke. It wasn't fireworks or a gun - it was a fire. And it was 3 doors down from my grandmother's house.

I immediately noticed a girl on a golf cart with a phone up to her ear so I ran over to her and asked if she was calling 911. She said no, she was on the phone with her mother. While I was confused why she found it more prudent to be talking to mom rather than the 911 dispatcher, I ran into the house and called 911. I was comforted someone had called before me, and the dispatcher informed me that the fire trucks were en route. I was told that it was a garage fire, and was instructed to make sure to stay a safe distace away.

When I got out of the house, a crowd of neighbors began to form, standing basically in the middle of the road, just watching the fire burn and marvelling at how high the flames were, how they could feel the heat from the flames even where they were. Soon more people arrived, in cars, parking on both sides of the road, leaving only a small path to drive through, and joined the crowd. Some of them even brought cameras and were taking pictures.

I have never felt so helpless as I did that night as I stood there, in our driveway, waiting for the firemen, watching the fire engulf not only the garage and takeover the storage shed and a nearby tree.

The firemen arrived about 10 minutes after I called 911. Gawkers from the area continued to gather. I actually watched two cars, and several crowds of people, either not pull over for the trucks, or fail to move out of the way.

Thankfully, the firemen were able to contain the fire in less than 5 minutes, and completely extinguish it within 10. The firemen from the nearest neighboring town even came to help out. I'm sure that every one of these men on both all-volunteer squads would've rather been doing whatever it was that they had been pulled away from. I'm sure their wives or girlfriends or families would've preferred that, too. However, their efficiency, and their obvious concern for not only the aforementioned property, but for the neighboring properties as well, was impressive.

In the end, the garage, shed, and the contents of both, including two vehicles, were completely lost, but the house and the neighboring properties remained virtually unharmed. Sure, the front of the deck was charred, and the siding had basically melted off. The siding on one side of the neighbor's garage had melted off and had some smoke damage. The front end of the neighbor's truck basically looked like melted plastic. But the homeowners still had a house to go home to. If the wind had been blowing in basically any other direction than the direction it was that night, the damage likely would've been much more significant and widespread.

I have never been so thankful to live only a few blocks from a fire station with a full-time staff.

And to all my readers, please promise me that if you see a fire or an emergency situation in your area, call 911 immediately. Please do not go out to gawk at it. Do not get in your car and drive to an area where you heard there is a fire, just so you can see it; do not use your police scanner to determine your nightly entertainment. Do not stand in the road, do not park your car so as to make it difficult to impossible for a fire truck to drive down, and do not be so oblivious as to not move out of the way for the emergency vehicles. Use common sense, stay away, and let the emergency services do their job. Just be thankful that you're safe, and hope that everyone at the affected property is safe, too.
Sunday, July 19, 2009

Green Beans with Olive Oil & Garlic

Hello, there. Remember me? Contrary to any rumors you may have heard, I haven't actually fallen off the face of the earth. In fact, I've been cooking quite a bit. I'm very excited to share this post with you, not because I think it's the beacon of culinary genius, but because it's made (almost) entirely with ingredients from my garden. This last week, I was able to pick some green beans! I decided they'd be the perfect companion to the beer can chicken my husband was grilling. And they were. So I picked them, and they were on my plate less than 20 minutes after I picked them.

By the way, have you made beer can chicken yet? If you haven't, what are you waiting for? I told you weeks ago to make it.


Green Beans with Olive Oil & Garlic
Serves 2

Total Cook & Prep Time - 10 minutes


INGREDIENTS
Green Beans
1-2 cloves garlic, minced (this was from my garden, too!)
olive oil
salt & pepper, to taste
grated parmesan cheese, if desired

DIRECTIONS
Wash & trim the green beans. Boil them or steam them for just a few minutes, or until they get bright green.

Meanwhile, heat oil in a small skillet and sautee the garlic until it gets soft & mellow.

Once the garlic is done, add the green beans to the skillet (I started them both at the same time and the green beans & garlic took about the same amount of time). Toss till combined. Add salt & pepper to taste. Sprinkle with a bit of freshly grated Parmesan cheese, if desired.

Thursday, July 2, 2009

Chicken in Spicy Garlic Broth

This is a great dish for those nights you've had a long day and really don't want to spend much time cooking. It has great depth of flavor and a nice spicy kick. The best part was that it only took about 15 or 20 minutes from start to finish.


Chicken in Garlic Broth
Recipe from Mary Ellen's Cooking Creations, adapted
Serves 2
Total Cook & Prep Time - 20 minutes


INGREDIENTS
2 chicken breasts, pounded a bit
1 TBSP butter & 1 TBSP olive oil
Flour, for dredging
Salt & Pepper
4-5 cloves garlic, minced
1 small onion, diced
1/4 - 1/2 tsp red pepper flakes
1/4 cup dry white wine or chicken broth
1 cup chicken broth
1/2 lb cooked fetuccini
Grated Parmesan cheese, optional

DIRECTIONS
Cook pasta to al dente. Drain & set aside.

Meanwhile, heat butter & oil in a large pan over medium heat. Season chicken with salt & pepper and then dredge in the flour. Cook chicken until cooked through, about 5 minutes per side. Transfer to a covered dish or the oven to keep warm.

Add a bit more oil to the pan if it is dry, and then sautee the garlic and onions until onions are soft. Add red pepper flakes.

Add wine and scrape up any brown bits, then add chicken broth and bring to a simmer. Simmer for about 5 minutes. Toss pasta in the broth. Return the chicken to the pan and cover the chicken in broth.

To serve, pour some sauce over the chicken and serve next to the pasta. Top with Parmesan cheese.


Sunday, June 28, 2009

Beer Can Chicken

Before I get started with this post, I have to say this: you must make this chicken. Now.

Beer Can Chicken was something I wanted to make for a long time, but didn't because I had a notion that it had to be grilled, and we didn't have a grill. So, when we got a grill, it was one of the first things I decided to make. Well, I should say that I enlisted my husband and his spectacular grilling skills to help me make it. I'm not sure why I put it off for so long - it really couldn't have been much easier and was the tastiest chicken I've ever had. You really do have to make it.


Beer Can Chicken
Recipe by Adam Gertler, via Carrie's Sweet Life, adapted
Serves 3-4

INGREDIENTS
1 (3-4 lb) chicken
1/4 cup kosher salt
1/4 + 1/8 (0.375) cup light brown sugar
1/4 cup paprika
1/8 cup chili powder
1/2 tsp dried rosemary (crushed lightly)
1/2 tsp dried thyme
1/8 cup garlic powder
1 can beer
2 sprigs rosemary
2-3 cloves garlic

DIRECTIONS
Mix all spices together. Rub all over the chicken, including the inside cavity. Wrap in plastic wrap and let sit in the refrigerator for at least 2 hrs, up to overnight.

When time to cook the chicken, open the beer and get rid of about half of it (what you do with the beer after you take it out of the can is your choice. ;) ) Put about 2 sprigs of rosemary and 2-3 cloves of smashed garlic in the can.

Put the can in a beer can holder (as seen in the picture below) and put the chicken on top of the holder.

Grill for about 1 1/2 hrs. Take it off the grill and let rest, either on the can or off the can, for about 10 minutes before carving.


Wednesday, June 17, 2009

Cheesesteaks

I haven't been intentionally neglecting my blog. I started a new job a few weeks ago where I stare at a computer for most of my day, so when I get home, staring at my computer for more time isn't necessarily appealing. Anyway, enough excuses.

I've never been to Philadelphia. Despite its historical significance to the country, I really don't have a huge desire to go there, either. Unfortunately, that means that I probably will not ever have a true cheesesteak. I wanted to try making one at home, though, so I looked at some "recipes" online that claim to be authentic and took a jab at it.

We were both quite pleased with the results. How it compares to the real thing, I have no idea, but it's probably better for my psyche that I never know that.


Cheesesteaks
Serves 2
Cook & Prep Time - 15 minutes


INGREDIENTS
1/2 lb deli roast beef
1/2 green pepper, sliced thinly
1 small onion, sliced
butter & olive oil
salt & pepper
1 hoagie buns
1/3 cup melted cheese whiz or 6 slices provolone

DIRECTIONS
Season roast beef slightly with salt & pepper. Cook in equal parts butter & olive oil over medium-low to medium heat. After a couple minutes, add the onions and peppers to the pan and saute until just tender.

Meanwhile, melt the cheese whiz in a small saucepan or double boiler.

Toast the buns, if desired. Add meat, veggies, and cheese in desired amounts. Consider slicing in half to make it easier to eat, and enjoy.

Saturday, June 6, 2009

Rhubarb Pie

With this post, I'd like to introduce what I hope to be a new segment on this blog called "Stuff I Made with Stuff I Grew in my Backyard." Yep, that's right - I have a garden this year. I'm very excited. My first creation from my homegrown goods was a rhubarb pie.

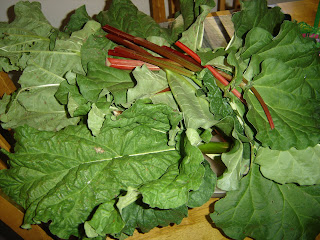
I grew up eating rhubarb and I love it. When baked, it's somewhat similar in taste to an apple, but softer and more tart. It pairs well with berries, but I prefer it on its own. It's very easy to work with, too. When picked out of the garden, it should look like this:


Don't be alarmed... your pile should be that size. Trim off the leaves. Don't be alarmed if some of your apparently mature rhubarb stalks are more green than red - they taste the same as the deep pink ones, they just aren't as pretty. Don't eat the leafy greens. Be sure to wash the stalks well. When you're all done with that, they should look like this:


Isn't that better? Cut them up into little pieces like you would chop up celery.

For this pie, I used my regular apple pie recipe, but used rhubarb instead of apples and coated them in a bit more cinnamon & sugar than normal. The result is an amazing pie.


You must try it right away.

Friday, May 29, 2009

Fetuccini Alfredo

Despite how much I love it, eating fetuccini alfredo makes me feel really guilty. My favorite recipe calls for something like 12 tablespoons of butter, over 2 cups of cream, and 1 1/2 cups of cheese. Don't get me wrong, it's pretty much the best Alfredo sauce ever, but healthy... it is not.

So, along came this recipe. It's great - smooth & creamy, and much healthier than my beloved recipe discussed above. It definitely won't take over the #1 spot, but will enter our regular rotation so we can leave the calorie-laden stuff for special occasions.


Fetuccini Alfredo
Inspired by Cooking Light
Serves 2-3
Prep & Cook Time - 15 minutes


INGREDIENTS
8 oz uncooked fetuccini noodles (fresh or dry)
1 TBSP butter
2 cloves garlic, minced
1 TBSP flour
1 1/2 cups 2% milk
1-2 TBSP 1/3-less-fat cream cheese
1 cup freshly grated Parmesan cheese
salt & pepper, to taste

DIRECTIONS
Cook fetuccini to al dente. Drain & set aside.

Meanwhile, melt butter in a large skillet or dutch oven over medium-low heat. Add garlic and cook for about 2 minutes, or until garlic is fragrant. Add flour and whisk together. Cook for about 1 minute, wisking constantly.

Add milk and combine thoroughly. Increase heat to medium and allow it to simmer until the sauce thickens, about 5-7 minutes.

Add cream cheese and Parmesan cheese and whisk together until cheese is melted. Toss with the cooked fetuccini noodles and top with additional Parmesan cheese, if desired.

Tuesday, May 26, 2009

Tomato Tortellini Soup

Sometimes there isn't a whole lot that's more satisfying than sitting down to a nice, hot bowl of a tomato-y soup with a grilled cheese. Sure, your exact preferences for the soup and sandwich may have changed a bit from you were a kid, but the combination is always just as satisfying.

This was the perfect twist on the old classic. The soup was nice and creamy with a nice, unexpected hint of spice and paired perfectly with my husband's excellent grilled cheese sandwiches.

Please click on the link below for a much better picture. Thanks.

Tomato Tortellini Soup

Recipe from
Better Homes & Gardens, adapted
Serves 4

Prep & Cook Time - 20 minutes


INGREDIENTS
1-2 TBSP butter or olive oil
1 small onion, diced
2-3 cloves garlic, minced
salt & pepper
4 cups chicken or vegetable broth (try to get reduced sodium)
4 oz flavored cream cheese - chive & onion or garlic & herb
1 can tomato soup
1 (9 oz) package refrigerated cheese tortellini)
dash red pepper flakes

DIRECTIONS
Melt butter in a dutch oven over medium heat. Add onion & garlic and cook for about 5 minutes, or until onions soften. Season with salt & pepper, if desired.

Add chicken broth and bring to a boil. Cook the tortellini in the broth for about 5 minutes, or until almost al dente.

Remove about 2 ladles of broth into a smaller bowl and whisk the cream cheese into the broth. Once smooth & creamy, return to the pot and stir until well-combined.

Add tomato soup and stir until combined. Season with salt & pepper, to taste. Add a dash of red pepper flakes and stir to combine.

Sunday, May 24, 2009

Italian-Style Chicken & Noodles

I really wanted to make this recipe for dinner. It had been on my menu planning list for about a week and a half. I'd combed through my cupboards and decided I had all the necessary ingredients. Then, I went to make it. I didn't have a packet of Italian dressing mix. So, I improvised and came up with this really tasty, really easy chicken & pasta dish. We both really liked it and will be making it again.


Italian Style Chicken & Noodles
Serves 3
Cook & Prep Time - 20 minutes


INGREDIENTS
2-3 TBSP butter
1 small onion, diced
3 cloves garlic, minced
salt & pepper
2-3 TBSP flour
1/4 cup chicken broth
1 cup milk
1 1/2 cups chopped rotisserie chicken
1/4 - 1/2 cup grated Parmesan cheese
1 frozen basil cube from Trader Joe's (or equivalent)
8 oz egg noodles, cooked to al dente

DIRECTIONS
Melt butter in a large skillet or dutch oven over medium heat. Add onion and garlic. Season with salt & pepper and let cook until onions soften and begin to be translucent (about 5 minutes). If the skillet is dry, add a little more butter. Add flour and whisk together to form a roux and whisk constantly for about a minute. Add chicken broth and stir to combine.

Reduce heat to medium low and add milk. Stir and let simmer until it begins to thicken. Once thickened to your liking, add Parmesan cheese and stir until the cheese melts. Season with salt & pepper, to taste.

Reduce heat to low. Add the basil cube and stir until cube is melted and combined in the sauce.

Add chicken and cook until heated through. Serve over the egg noodles.

Wednesday, May 20, 2009

New Coq au Vin

I've had traditional Coq au Vin in restaurants, but never made it at home. I'd thought about it many times, but never really was interested enough to spend hours cooking it. Then, I came across this recipe for New Coq au Vin on Epicurious and knew I had to make it straight away.

In addition to finding a great new recipe, I was pleasantly surprised to discover that I really like the taste of braised celery. I don't really like celery, but when braised in this recipe, it took on a completely different flavor. It was delicious, and very easy. Unfortunately, I completely forgot to take a picture, so you're going to have to use your imagination.

New Coq au Vin
Recipe adapted from Epicurious
Serves 3-4
Prep & Cook Time - about an hour


INGREDIENTS
6 chicken legs & thighs with skin and bone
2 tablespoons olive oil
10 garlic cloves, halved
3 celery ribs, cut crosswise into 1-inch pieces
1 shallot or small onion, diced finely
1 cup dry white wine
1 cup water
handful finely chopped flat-leaf parsley

DIRECTIONS
Season chicken with salt & pepper. Heat oil in a large heavy skillet over medium-high heat until it shimmers. Sear chicken until the skin is golden brown, 3 to 5 minutes, then transfer to a plate.

Pour off all but 2 tablespoons fat from skillet. Cook garlic, shallot or onion and celery in skillet over medium heat, stirring frequently, until golden and just beginning to soften, about 5 minutes. Add wine and boil, uncovered, until reduced by about half, 3 to 5 minutes. Add water and bring to a simmer.

Return chicken to the skillet and simmer, partially covered, until cooked through, 20 to 25 minutes. Sprinkle with parsley.

Monday, May 11, 2009

Greek Chicken Sandwiches

In St. Paul, we have a great take-out gyro place called Dino's. I'm not really a fan of gyros, but they have a Greek chicken sandwich that's fantastic. I don't think I've ever ordered anything else there. Unfortunately, Dino's is a bit on the expensive side, so one day, I got to thinking about trying to make one at home. It didn't seem like it should be too tough. Then, I noticed Greek dressing at SuperTarget a few weeks ago and got to work.

Thus, this sandwich was born. It tastes just like the sandwiches from Dino's, and at a fraction of the cost. We loved them and hope you enjoy them, too. And if you're in St. Paul, go to Dino's. You won't regret it


Greek Chicken Sandwiches
Makes 2 sandwiches
Cook & Prep Time - about 15 min

INGREDIENTS
2 chicken breasts
1/3 - 1/2 bottle Greek dressing
thinly sliced red onion
thinly sliced tomato
sliced romaine lettuce
feta cheese crumbles
2 pita rounds

DIRECTIONS
Place chicken breasts inside a ziplock bag and cover with Greek dressing. Make sure the chicken is coated and place in the refrigerator to marinade for about 6-8 hours.

Grill the chicken and cut into long strips.

Meanwhile, wrap the pitas in aluminum foil and warm up in the oven at 350 degrees for about 10 minutes.

To build the sandwich, place the chicken strips on top of the pita. Dress with lettuce, tomato, onion (whatever and how much you desire) and feta, and top with Greek dressing. Wrap up like a taco.

Saturday, May 9, 2009

Meyer Lemon Cookies

These cookies were my first ever experience with meyer lemons. I'd heard a lot about them, but had never even seen them at the grocery store, so I had basically written them off. Then, all of a sudden, I found them at three different local grocery stores. I bought a few and decided to figure out what to make with them later.

I really liked these cookies. They're nice and soft and have a subtle hint of lemon in both the cookie and the frosting.


Meyer Lemon Cookies
Recipe from Canela and Comino
Makes about 16 cookies


INGREDIENTS

Cookies
1 1/4 cups flour
1/2 tsp baking soda
1/2 tsp salt
1/3 cup milk
juice of half a lemon (zest the lemon first and set the zest aside for the icing)
1/3 cup butter, softened
1/2 cup sugar
1 egg

Icing
1 1/2 cups powdered sugar
1 TBSP honey or light corn syrup
juice of half a lemon
zest of a whole lemon
1 TBSP water

DIRECTIONS

Cookies
Preheat oven to 350 degrees.

In a medium bowl, combine flour, baking soda, and salt. In another bowl or measuring cup, combine the milk, lemon juice, and vanilla.

In a separate medium bowl, cream butter and sugar until light & fluffy. Add egg and mix well. Mix in the flour mixture and milk mixture, alternating flour and milk.

Scoop out batter onto a baking sheet, leaving plenty of room for them to spread out.

Bake for 11-13 minutes, or until lightly golden brown. Transfer to a cooling rack and allow to cool completely before frosting.

Icing
Mix together all ingredients with an electric mixer. Use to frost the cookies when they are completely cooled.

Tuesday, May 5, 2009

Crockpot Salsa Chicken

Feliz Cinco de Mayo, mis amigos. In honor of the day, I have a quasi-"Mexican" dish for you that I think you'll love.

Also on my list of easy, minimal ingredient dinners is Crockpot Salsa Chicken. I'd seen it floating around the blogosphere for some time now, and always felt like it was something I should make, but never got around to it. Yesterday, I finally made it.

This was really delicious. I felt like I was eating an enchilada without the tortilla. I served it with some cilantro-lime rice on the side, and I think next time I will shred the chicken and mix together the chicken, sauce, and rice. After a few bites, I started doing that, and I liked it much better. I hope you enjoy it too!


Crockpot Salsa Chicken

Recipe from Food alla Puttanesca, adapted
Serves 2-3

Prep Time - 2 minutes

INGREDIENTS
2-3 chicken breasts
1 envelope taco seasoning
1 can Cream of Chicken Soup (try to use the reduced sodium kind)
1 cup salsa

DIRECTIONS
Place chicken breasts into the slow cooker and sprinkle with the taco seasoning. Add the can of cream of chicen soup and then salsa. If necessary, use a spoon or scraper to make sure the chicken is coated.

Cook on low for about 6 hours.

When finished, add a dollop of sour cream and serve with a side of rice.

Friday, May 1, 2009

Chicken in Creamy Pan Sauce

I think it's important for everyone to have a collection of quick recipes that call for only a few basic ingredients. As much as we may want to, not everyone has the time to slave over the stove every night. That's why I'm posting this recipe. It was a hit at our house and I hope you enjoy it, too.
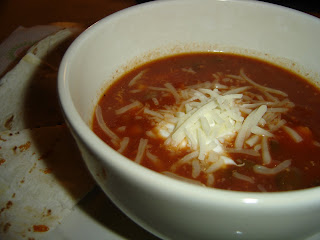

Chicken in a Creamy Pan Sauce
Recipe from Kraftfoods, adapted
Serves 2
Cook & Prep Time - about 20 minutes


INGREDIENTS
2 boneless skinless chicken breasts
3-4 TBSP flour, seasoned with salt & pepper
1 -2 TBSP oil
3/4 cup chicken stock
4 oz. plain cream cheese, softened & cubed
1 clove garlic, minced
A few leaves basil, thinly sliced

DIRECTIONS
Place chicken in a big ziplock bag with the seasoned flour. Shake to coat.

Meanwhile, heat oil in large skillet on medium heat. Add chicken and cook 5 to 6 min. on each side or until cooked through. Remove chicken from skillet and reserve the drippings in the skillet. Cover chicken with foil to keep warm.

Add chicken stock to skillet. Stir to scrape up browned bits from bottom of skillet. Add the garlic and cream cheese and cook 2 to 3 min. or until the cream cheese is melted and sauce starts to thicken. Stir constantly with wire whisk.

Return chicken to skillet and coat both sides with the sauce. Cook about 2 min. to make sure the chicken is nice and hot. Sprinkle with basil.

Serve with a side of hot rice.

Wednesday, April 22, 2009

Crockpot Rotisserie-Style Chicken

Well, as promised in my last post, here it is. A chicken you can make in your crockpot that will taste like a rotisserie chicken. I was inspired to try this when I was browsing the spice aisle at my local grocery store and noticed a bottle of spices called "rotisserie." So, I went home and googled the spice combination and came across a recipe for a crockpot rotisserie chicken on A Year of Crockpotting. It looked easy enough, and I decided if it turned out well, it would be a lot more economical than buying rotisserie chickens at the grocery store to use in various recipes.

I hope you like this recipe. It couldn't have been easier and came out so tender and delicious. It didn't taste exactly like the rotisserie chicken from the grocery store, but it was very close, and the meat was even more tender. I'd make it again in a minute.


Please try to ignore how bad this picture is. Thanks.

Crockpot Rotisserie Chicken
From A Year of Crockpotting, adapted slightly

INGREDIENTS
1 whole chicken (3-4 lbs)
2 1/2 tsp kosher salt
1 tsp paprika
1 tsp onion powder
1/2 tsp dried thyme
1 tsp Italian seasoning
1/2 tsp cayenne pepper
1/2 tsp black pepper
pinch of chili powder
4 whole garlic cloves (optional)
1 small onion, quartered (optional)

DIRECTIONS
In a bowl combine all dried spices. Rub the mixture all over the bird, including inside the cavity.

If desired, place the garlic and onion inside the cavity.

Place the chicken in your crockpot, breast side down. Do not add any liquid. Cook on low for about 8 hrs.

Sunday, April 19, 2009

Indian Butter Chicken

I recently dabbled into making curry. I don't know why, but for some reason, making Indian food seemed a little out of my reach. I don't know what changed my mind. I think I figured that if so many people like curries, they can't be that hard to make. I know that logic doesn't exactly follow, but go with it, OK?

Given that my husband has some different tastes than I do, I decided that Chicken Makhani, or Butter Chicken, was the safest bet for the two of us. Sort of as I suspected, I got mixed reviews. I thought it was great, but my husband thought it was OK, but had the same spicy/sweet combination he doesn't like in Chinese food. I think that's crazy, but to each his own, I guess. I didn't get that at all from this recipe, but if you do have those same issues with Chinese, this recipe may not be for you. If you don't have those issues, I suspect you'll love it, too.


Chicken Makhani
Recipe from FoodNetwork, adapted
Serves 4-5

Prep Time - 5 minutes

Cook Time - about 30 min


INGREDIENTS

Spice Blend
1 tsp garam masala seasoning*
1 tsp ground ginger
1/2 tsp cayenne pepper

Sauce
3 TBSP butter
1 large onion, chopped
2-3 cloves garlic, minced
1 TBSP tomato paste
1 (15 oz) can tomato sauce
1 (14 1/2 oz) can diced tomatoes in juice
1 skinless rotisserie chicken, pulled & cut into small chunks**
1/4 - 1/2 tsp red pepper flakes
1/2 cup heavy cream

Hot basmati rice, for serving
warm Naan bread, for serving

DIRECTIONS
Spice Blend
Stir the ingredients together in a small bowl and set aside.

Sauce
Melt butter in a large skillet over medium heat. Add the onion and cook, stirring frequently, for about 5 minutes, or until onions are translucent. Add garlic, tomato paste, and spice blend, and cook about 1 minute. Stir constantly.

Add the tomato sauce and diced tomatoes and stir well.

Add the chicken pieces and stir to combine. Reduce heat to low and cook uncovered for about 10 minutes, or until the chicken is warmed through. Stir frequently.

Serve over hot, buttered basmati rice with warm naan bread.

*The original recipe calls for 1 TBSP of garam masala seasoning and 1/2 tsp of ground cinnamon in addition to the spices listed. This smelled almost exclusively like cinnamon to me, so I omitted the cinnamon and reduced the amount of garam masala. I would do this again.

**I made a rotisserie spiced chicken in my crockpot. It was super simple and delicious. I will post that recipe soon.

Thursday, April 9, 2009

Spaghetti & Meatballs

When I was growing up, spaghetti was always a jar of Ragu or Prego mixed with some ground beef browned with some salt & pepper, and mushrooms. We're Swedish - Italian food really isn't our forte. I loved my parents' spaghetti when I was a kid and didn't know any better, but as I've grown up, my tastes have grown a bit as well, and I now love a nice plate (or bowl) of spaghetti with meatballs, in a nice homemade marinara sauce. In fact, if I order any kind of spaghetti in an Italian restaurant, that's what I'll order. However, I'd never made them at home. I'm not sure if it never dawned on me or if I was somehow intimidated by the Italian spiced meatball, but I finally got over whatever my issue was, read a few different recipes to get an idea of the general ingredients, and made them.

They were great. And as an added bonus, the leftovers make excellent meatball subs.


Spaghetti & Meatballs
Serves 4-5
Prep & Cook Time - about an hour

INGREDIENTS
1 lb ground beef
1 egg, beaten
1/2 cup bread crumbs
2 TBSP tomato paste
3-4 cloves garlic, minced
1 tsp oregano
1 tsp salt
1/4 tsp pepper
6-7 TBSP grated Parmesan cheese
Marinara sauce
1 lb spaghetti, cooked to al dente.

DIRECTIONS
Preheat oven to 375 degrees.

In a large bowl, combine ground beef, egg, bread crumbs, tomato paste, garlic, oregano, salt, pepper, and Parmesan cheese.

Roll the mixture into small balls. Place the balls on a lightly greased baking sheet and bake for about 30 minutes, or until meatballs are fully cooked.

Meanwhile, start your marinara sauce. I usually make mine by combining some canned tomato sauce or crushed tomato with lots of garlic & basil, until it tastes good. This recipe is excellent.

When meatballs are fully cooked, remove from the oven and add to your marinara sauce. Simmer for about 15 minutes.

Serve on a bed of cooked spaghetti noodles. Enjoy!

Saturday, April 4, 2009

The Best Chocolate Cheesecake. Ever.

Like the title says, this is the best chocolate cheesecake. Ever. I first made it when I had to make dessert to bring to dinner at my in-laws about a year and a half ago. But that time, I sort of cheated and bought a pre-made crust. I've made it several times that way and it's always delicious. However, when I decided to make a cheesecake for dinner with my mother-in-law recently, I decided to stop cheating and make it in an actual springform pan.

I was quite pleased with the results, even though the only chocolate wafer cookies or graham crackers I could find happened to be teddy grahams. But the teddy graham crust was my little secret.

You'll really love this cheesecake. Give it a try - you won't regret it.


Chocolate Cheesecake

Recipe by Emeril Lagasse

Serves 12-ish


INGREDIENTS
1 1/2 cups chocolate wafer crumbs
1 cup plus 3 TBSP sugar
3 TBSP butter, melted
2 1/2 (8-oz) packages cream cheese, softened at room temperature
1 1/2 tsp vanilla extract
1 vanilla bean, seeds scraped from inside of pod and reserved
3 TBSP all-purpose flour
3 eggs
1 cup sour cream
8 oz melted semisweet chocolate, cooled slightly
Fresh strawberries or raspberries, for garnish

DIRECTIONS
Preheat oven to 325 degrees F.

Lightly grease the bottom and sides of a 9-inch spring-form pan. In a mixing bowl, combine the chocolate wafer crumbs, 3 TBSP of the sugar, and the butter and mix well. Press onto the bottom of springform pan and set aside.

In a large mixing bowl with an electric mixer, combine cream cheese, remaining cup of sugar, vanilla extract and vanilla bean seeds and beat until light and creamy, but do not over-beat.

Add the flour to the cream cheese mixture and beat until smooth. Add the melted chocolate and sour cream and mix well, but do not over-beat.

Add the eggs, 1 at a time, mixing on low speed after each addition until just blended. Again, make sure you do not over-beat the mixture.

Meanwhile, prepare a water bath by making a water-tight seal around the spring form pan with aluminum foil.

Pour the batter into prepared pan. Place the pan in a large roaster and place warm water in the roaster about 1/2 way up the springform pan. Bake for 1 hour to 1 hour and 10 minutes, until the center is almost set. Turn off the oven and let the cheesecake remain in the oven for about 45 minutes.

Remove from the oven and run a sharp knife around the rim of the pan and allow cake to cool on a wire rack before removing rim of pan. Refrigerate at least 4 hours or overnight before serving.

Thursday, April 2, 2009

Toasties & Chips

The Toasted Special, or the Toastie, is Irish pub grub, in my opinion, at its best. It's a simple sandwich that you can find anywhere, it's cheap, and it's always satisfying. I think I ate one every single day on my last trip to Ireland. In short, it's a toasted ham & cheese sandwich with onion & tomato, usually served with some thick fries. Unfortunately, they're virtually impossible to find in any Irish pub I've been to in the United States.

The good news is that they're super simple to recreate at home in your oven or toaster oven. So what's stopping you? Go make one already.


Toasted Special
Makes 1 sandwich

INGREDIENTS
2 slices white bread
3 slices deli ham
thinly sliced cheddar cheese (enough to cover the bread - 3 did it for me)
Red onion slices, to taste
2 slices thinly sliced tomato

DIRECTIONS
Preheat oven to 400 degrees F.

Assemble sandwich in the following order: ham, cheese, onion, tomato.

Place the sandwich in the oven for 7-10 minutes, or until bread is lightly browned and the cheese is melted and almost oozing out the sides.

Cut diagonally into four triangles.

Tuesday, March 31, 2009

Fried Chicken II

I would love to be able to tell you an amusing little story about how I came up with this fried chicken, or how I came to love fried chicken, or even something funny that happened while making this fried chicken. However, there are no stories. My husband I wanted fried chicken, and decided to try a different recipe from the usual, so this fried chicken was born out of an Alton Brown recipe and an Aaron McCargo, Jr. recipe, with a little twist of my own.

It was a great dish to accompany a night of watching Ballykissangel on our Netflix Roku box before series 2 becomes unavailable for instant watch tomorrow.


Fried Chicken
Inspired by
Alton Brown & Aaron McCargo, Jr.
Serves 2


INGREDIENTS
4-6 pieces chicken (we like legs)
oil, for frying
1/2 TBSP kosher salt
1 TBSP black pepper
1 TBSP paprika (any variety)
1 tsp garlic powder
1/2 tsp onion powder
1 tsp cayenne pepper
1 egg, lightly beaten
flour, for dredging

DIRECTIONS
Mix together spices. Use about 1/3 to rub on the chicken. Let sit in the fridge for about 2-3 hours.

After chicken is out of the refrigerator, set up a breading station: place the beaten egg in a shallow bowl and mix it with about 1 tsp of the spice mixture. Place the flour in another shallow bowl and mix about 2 TBSP of the spice mixture with that.

Coat the chicken pieces in egg and then dredge in flour till fully coated.

Meanwhile, heat the oil in a deep fryer, dutch oven, or heavy skillet to 350 degrees. Cook the chicken for about 13 minutes. Drain on a wire rack for a few minutes before serving.

Monday, March 23, 2009

Taco Soup

I've noticed that a lot of my posts seem to reference the weather. Well, this post isn't going to be any different. On Friday, it was chilly and rainy outside, so I decided to make a chicken taco soup in my slow cooker and pair it with nice, cheesy quesadillas. It hit the spot. We were both very pleased with the results and wouldn't hesitate to make it again.


Chicken Taco Soup
Serves 4-6

INGREDIENTS
2 chicken breasts, cooked & cut into small chunks
1 onion, chopped
1 clove garlic, minced
1 jalapeno pepper, diced
1/2 green pepper, chopped
1-2 cans diced tomatoes with green chiles, undrained
1 (8 oz) can tomato sauce
1 (10 oz) can hot & spicy chili beans
4 cups tomato juice
1 (1.25 oz) packet taco seasoning
Sour cream, for garnish
shredded cheese, for garnish

DIRECTIONS
Add all ingredients to the slow cooker and stir to combine. Cook on low for 5-6 hours.

Ladle into bowls and garnish as desired.